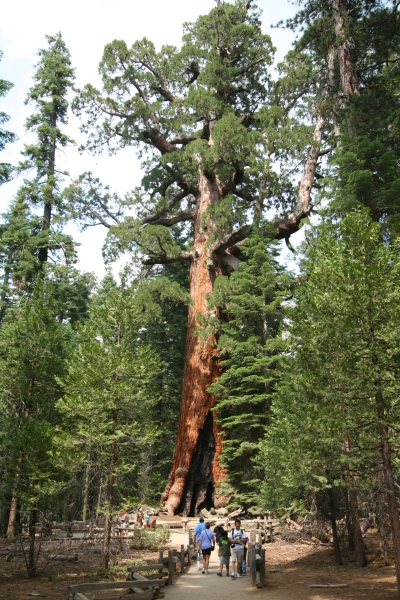
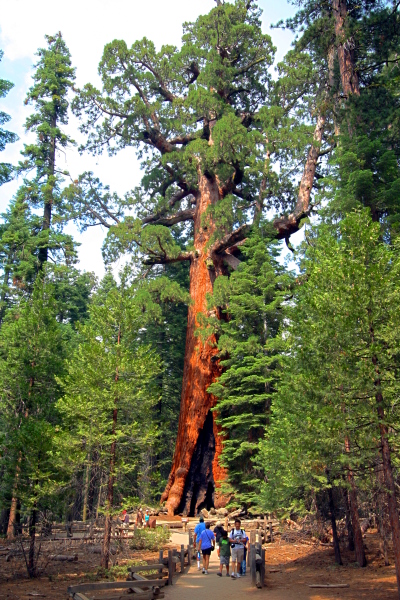
GIMP ile HDR tekniklerini araştırırken http://gimpology.com/submission/view/fake_hdr_look_in_gimp/ de yazan makaleye rastladım ve okudum. Akşam arkadaşım Volkan ile ilgili tekniği okuyup uyguladık ve sonuç oldukça etkileyici idi. Ancak her fotoğraf için bu işle uğraşmak gerçekten can sıkıcı olabilir diye düşündüğümden ilgili tekniğin scriptini yazmaya karar verdim:
; barisefe-enhance-my-photo.scm version 1.0
; 20 July 2008
;
; This program is free software; you can redistribute it and/or modify
; it under the terms of the GNU General Public License as published by
; the Free Software Foundation; either version 2 of the License, or
; (at your option) any later version.
;
; This program is distributed in the hope that it will be useful,
; but WITHOUT ANY WARRANTY; without even the implied warranty of
; MERCHANTABILITY or FITNESS FOR A PARTICULAR PURPOSE. See the
; GNU General Public License for more details.
; You should have received a copy of the GNU General Public License
; along with this program; if not, write to the Free Software
; Foundation, Inc., 675 Mass Ave, Cambridge, MA 02139, USA.
; Only tested on v2.4
(define (backgr))
(define (script-fu-barisefe-enhance-my-photo img drawable saturation darken-only-opacity)
(gimp-image-undo-group-start img)
(define original (car (gimp-layer-copy drawable 1)))
(define hue (car (gimp-layer-copy drawable 1)))
(gimp-image-add-layer img hue -1)
(gimp-desaturate-full hue DESATURATE-AVERAGE)
(gimp-invert hue)
(plug-in-softglow 1 img hue 10 0.75 0.85)
(gimp-drawable-set-name hue “hue”)
(gimp-layer-set-mode hue SOFTLIGHT-MODE)
(gimp-layer-set-opacity hue 50)
(define dark (car (gimp-layer-copy hue 1)))
(gimp-image-add-layer img dark -1)
(gimp-drawable-set-name dark “dark”)
(gimp-layer-set-opacity dark 75)
(define light (car (gimp-layer-copy original 1)))
(gimp-image-add-layer img light -1)
(gimp-drawable-set-name light “light”)
(gimp-levels light HISTOGRAM-VALUE 100 255 1 0 255)
(gimp-layer-set-mode light DARKEN-ONLY-MODE)
(gimp-layer-set-opacity light darken-only-opacity)
(set! backgr (car (gimp-image-merge-visible-layers img CLIP-TO-BOTTOM-LAYER)))
(gimp-drawable-set-name backgr “backgr”)
(script-fu-dodge-burn img backgr 10 25)
(gimp-hue-saturation backgr ALL-HUES 0 0 saturation)
; Cleanup
(gimp-image-undo-group-end img)
(gimp-displays-flush)
)
(script-fu-register “script-fu-barisefe-enhance-my-photo”
_”<Image>/Script-F_u/Baris Efe/Enhance My Photo”
“Enhance My Photo”
“www.barisefe.com”
“Enhance My Photo”
“20 July 2008”
“”
SF-IMAGE “Image” 0
SF-DRAWABLE “Drawable” 0
SF-ADJUSTMENT _”Saturation” ‘(50 0 1000 1 1 0 1)
SF-ADJUSTMENT “Darken Only Opacity” ‘(35 0 1000 1 1 0 1)
)
Teknik dodge-burn scriptini kullandığı için öncesinde(veya aynı anda) bu script kurulmalı. Kurulumu ise aşağıda linklerini verdiğim scriptleri /usr/share/gimp/2.0/scripts altına atarak yapabilirsiniz. Scripti “Script-Fu->Baris Efe->Enhance My Photo” altından çalıştırabilirsiniz. Öncesinde auto white balance veya auto normalize yapmanızı tavsiye ederim. “Saturation” ve “Darken Only Opacity” ile oynayarak fotografınıza uygun parametreyi ayarlayabilirsiniz.
Kolay gelsin…

